BehringerXTouchExtender 2.0.0-beta.0
dotnet add package BehringerXTouchExtender --version 2.0.0-beta.0
NuGet\Install-Package BehringerXTouchExtender -Version 2.0.0-beta.0
<PackageReference Include="BehringerXTouchExtender" Version="2.0.0-beta.0" />
<PackageVersion Include="BehringerXTouchExtender" Version="2.0.0-beta.0" />
<PackageReference Include="BehringerXTouchExtender" />
paket add BehringerXTouchExtender --version 2.0.0-beta.0
#r "nuget: BehringerXTouchExtender, 2.0.0-beta.0"
#:package BehringerXTouchExtender@2.0.0-beta.0
#addin nuget:?package=BehringerXTouchExtender&version=2.0.0-beta.0&prerelease
#tool nuget:?package=BehringerXTouchExtender&version=2.0.0-beta.0&prerelease
🎚️ BehringerXTouchExtender




Send and receive events with a Behringer X-Touch Extender DAW MIDI control surface over USB.
- Quick Start
- Prerequisites
- Installation
- Connection
- Track identifiers
- Reactive data
- Usage
- References
- Acknowledgements
Quick Start
dotnet new console
dotnet package add BehringerXTouchExtender
// Program.cs
using BehringerXTouchExtender;

using var device = BehringerXTouchExtenderFactory.CreateWithRelativeMode();
device.Open();

var scribbleStrip = device.GetScribbleStrip(0);
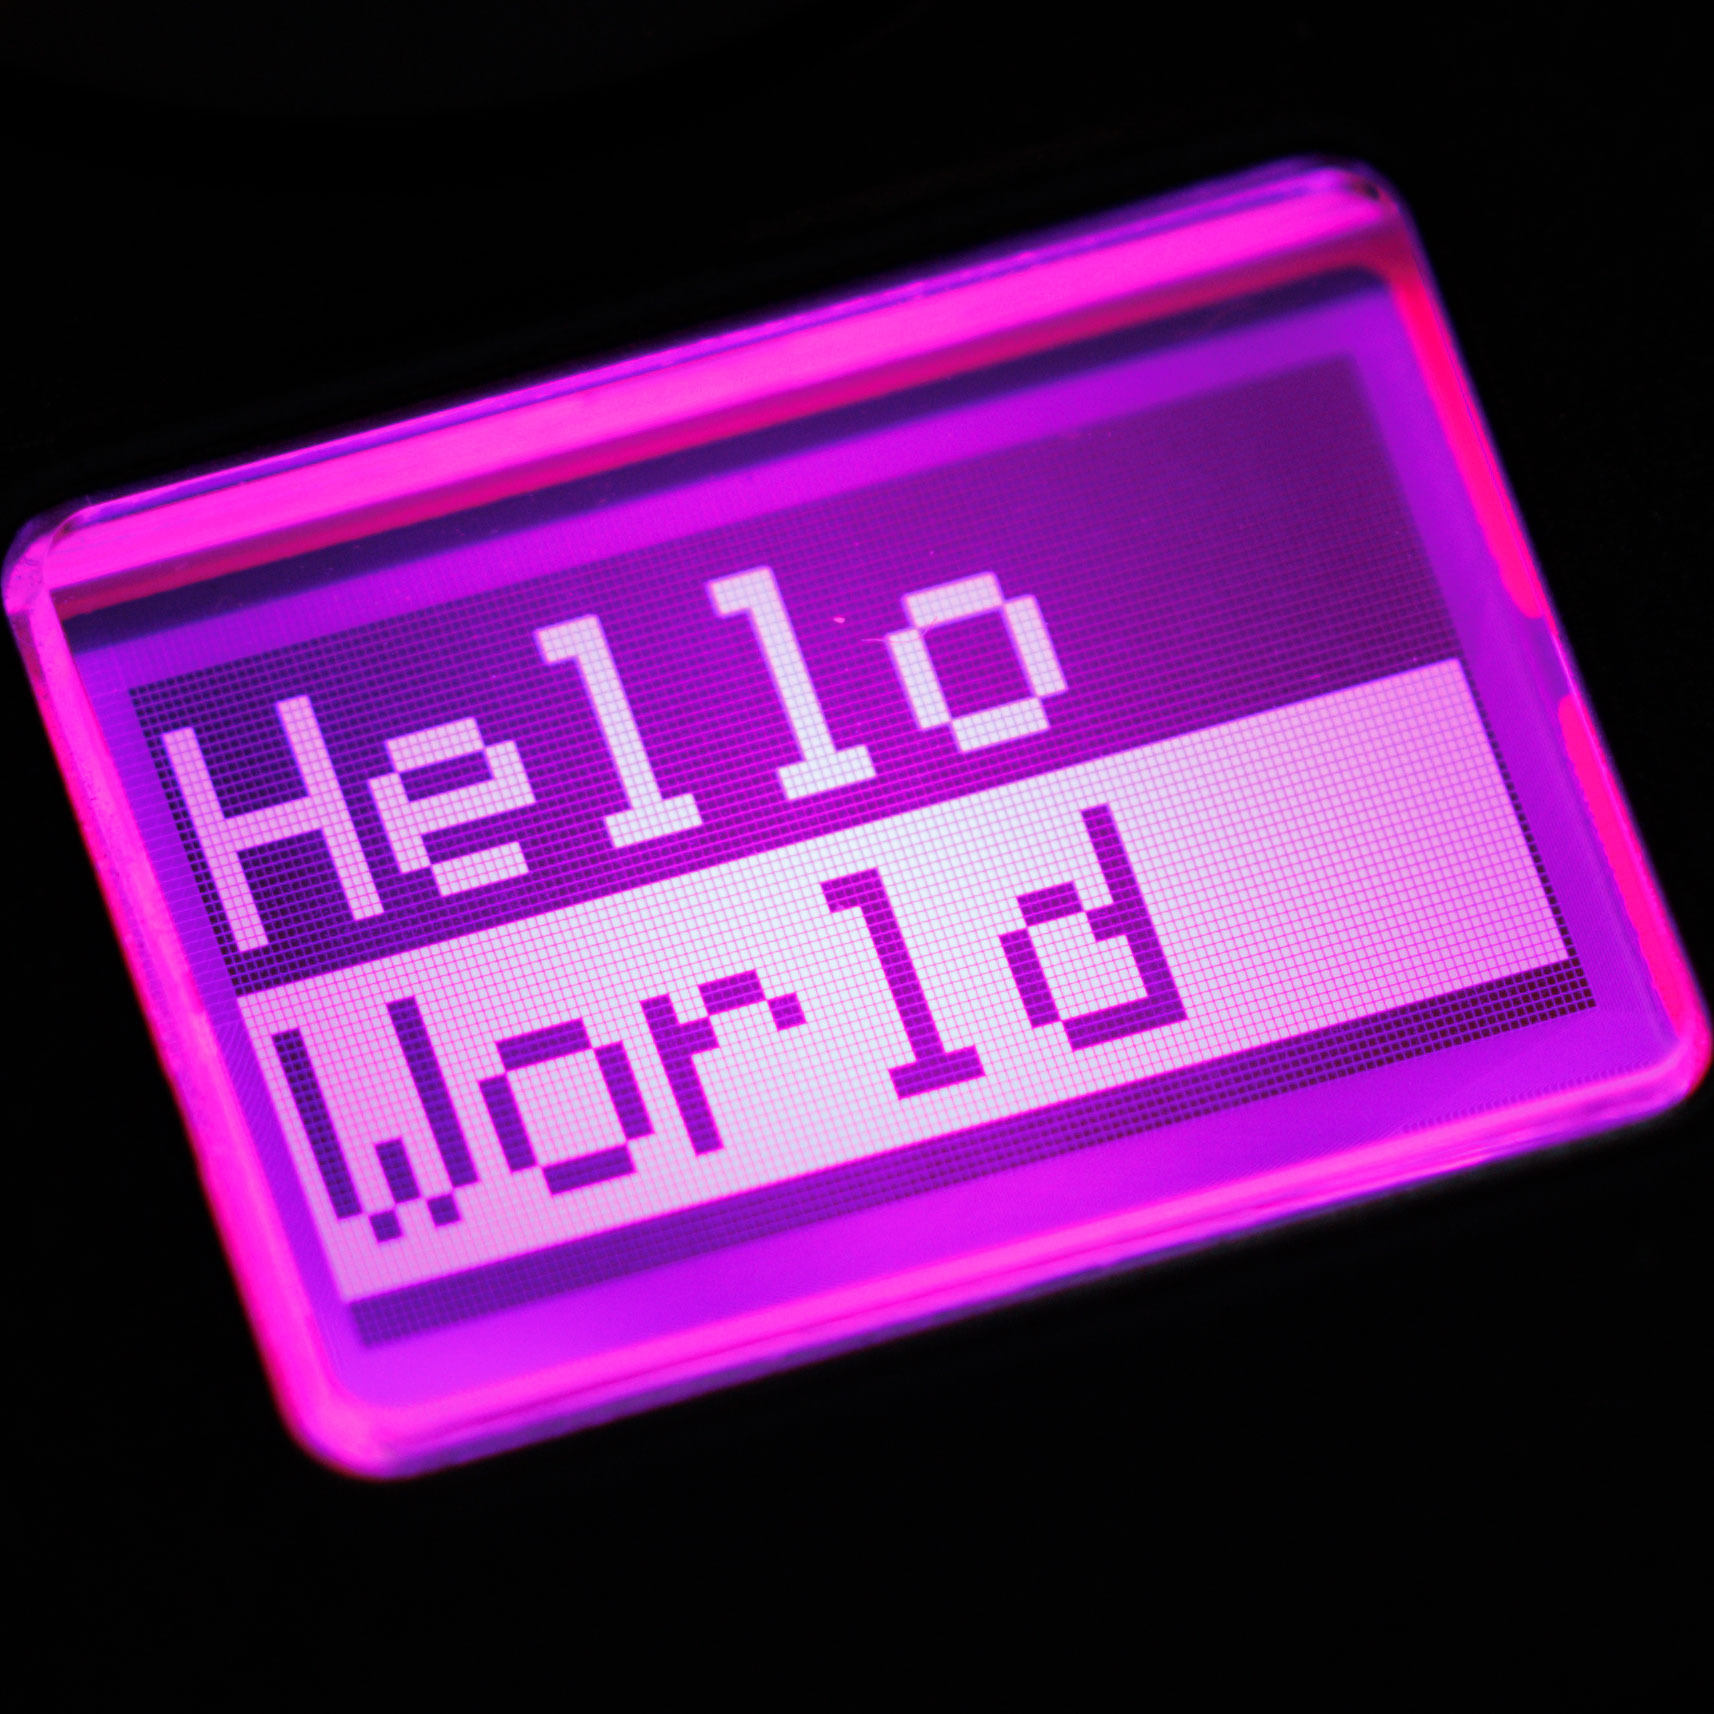
scribbleStrip.TopText.Connect("Hello");
scribbleStrip.BottomText.Connect("World");
scribbleStrip.TopTextColor.Connect(ScribbleStripTextColor.Light);
scribbleStrip.BottomTextColor.Connect(ScribbleStripTextColor.Dark);
scribbleStrip.BackgroundColor.Connect(ScribbleStripBackgroundColor.Magenta);
dotnet run
Prerequisites
- A Behringer X-Touch Extender
- A Microsoft .NET runtime that supports .NET Standard 2.0 or later:
MIDI control mode
The X-Touch Extender has four modes of operation. This library is compatible with three of them. You must manually configure the device to have the desired mode, and also inform this library which mode you chose.
Absolute Ctrl |
Relative CtrlRel |
HUI | |
|---|---|---|---|
| Factory method | CreateWithRelativeMode |
CreateWithAbsoluteMode |
CreateWithHuiMode |
| Rotary encoders | Delta to initial angle<br>☹ 1 light<br>☹ No fill<br>☹ No boundaries | Delta to previous angle<br>☹ 1 light<br>☹ No fill<br>☹ No boundaries | Delta to previous angle<br>👍 Multiple lights<br>👍 4 fill patterns<br>👍 Boundary option |
| Scribble strips | 👍 2 rows<br>👍 7 columns<br>👍 Light or dark text<br>👍 8 background colors | 👍 2 rows<br>👍 7 columns<br>👍 Light or dark text<br>👍 8 background colors | ☹ 1 row<br>☹ 4 columns<br>☹ Light text<br>☹ Dark background |
| VU meters | ☹ 1 light<br>☹ No fill | ☹ 1 light<br>☹ No fill | 👍 Multiple lights<br>👍 Fill below |
MC (Mackie Control) mode is not supported.
- Hold the leftmost <kbd>Select</kbd> button down
- Turn on the X-Touch Extender and wait for it to boot into the configuration setup mode
- Release the leftmost <kbd>Select</kbd> button
- Turn the leftmost rotary encoder knob until the LCD shows
Ctrl(absolute MIDI control mode),CtrlRel(relative MIDI control mode), orHUI(Mackie Human User Interface mode) - Press the leftmost <kbd>Select</kbd> button
- Remember which mode you chose when you connect to the device
Once configured, the X-Touch Extender will persist this control mode setting until you change it again, even after being turned off or unplugged. You don't have to set it every time you turn the device on.
Firmware upgrade
If your computer has an AMD Zen2 (Ryzen 3000 series) or later CPU, then you must install X-Touch Extender firmware 1.21 or later to fix the broken USB connection.
- Download the firmware
- Extract the
.syxfile from the.zipfile - Turn on the X-Touch Extender while holding the rightmost Record button
- Download and run MIDI-OX on an unaffected (e.g. Intel CPU) computer connected to the X-Touch Extender over USB
- Select Options › MIDI Devices and highlight the
X-Touch-Extentries - Select Actions › Send › SysEx File and choose the
.syxfile from step 2 - Wait for the upgrade to finish
- Reboot the X-Touch Extender using its power switch
Installation
You can install this library into your project from NuGet Gallery:
dotnet package add BehringerXTouchExtender
Connection
- Use
BehringerXTouchExtenderFactoryto create a device instance you can use. The choice of which factory method to call depends on the device's configured MIDI control mode.- If you set your X-Touch Extender to Absolute
Ctrlmode:using BehringerXTouchExtender; using var device = BehringerXTouchExtenderFactory.CreateWithAbsoluteMode(); - If you set your X-Touch Extender to Relative
CtrlRelmode:using BehringerXTouchExtender; using var device = BehringerXTouchExtenderFactory.CreateWithRelativeMode(); - If you set your X-Touch Extender to
HUImode:using BehringerXTouchExtender; using var device = BehringerXTouchExtenderFactory.CreateWithHuiMode();
- If you set your X-Touch Extender to Absolute
- Once the X-Touch Extender is powered on and connected over USB, open the connection.
device.Open();
Track identifiers
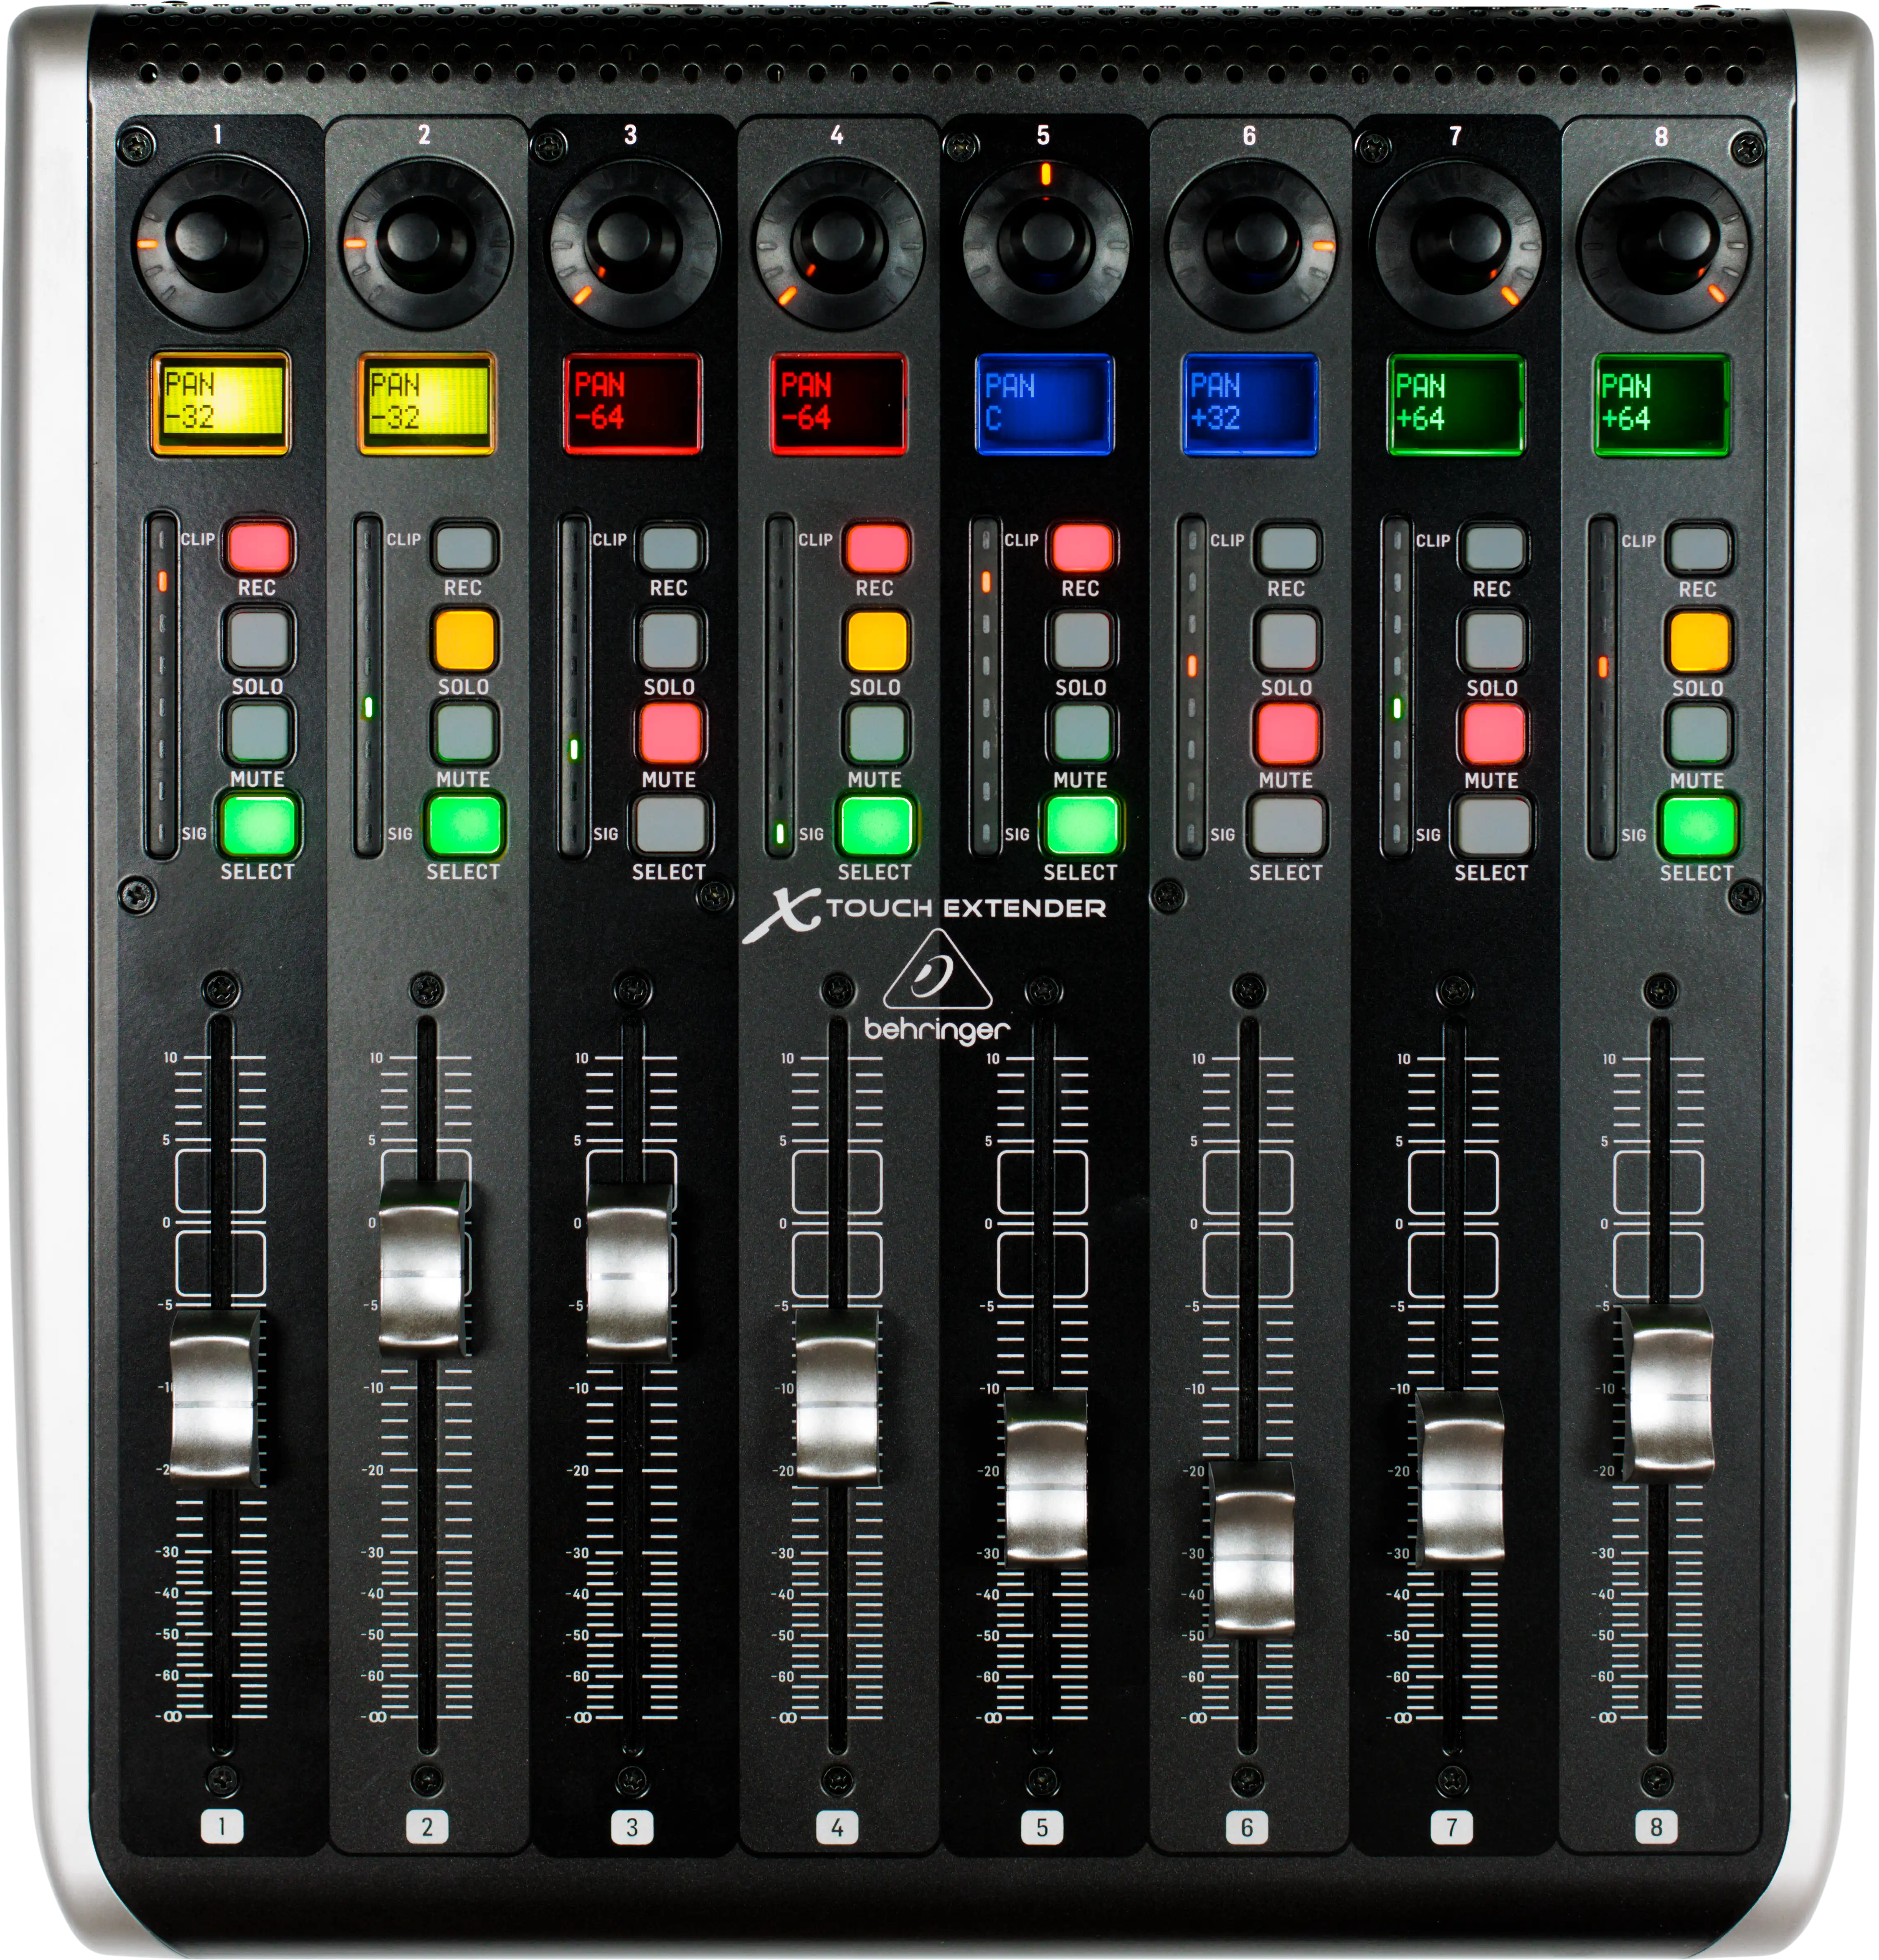
The X-Touch Extender is divided into eight vertical banks of controls, called tracks or channels. In this library, they are numbered from 0 on the left to 7 on the right (0-indexed).
On the physical device, the painted legends are 1-indexed, but 0-indexing is easier and less confusing to use in software.
Any time this library takes or provides a track ID, it's 0-indexed.
In most of the code examples below, the trackId argument used is 0.
Reactive data
This library handles data using KoKo Property objects. These encapsulate values that can change, including automatically in response to other Properties, and they automatically fire change events.
If you have your own Property that you want to drive a control on the X-Touch Extender, you can connect it to this library.
using KoKo;

var scribbleStrip = device.GetScribbleStrip(0);
var greeting = new StoredProperty<string>("Hello");
scribbleStrip.TopText.Connect(greeting);
// The device will show "Hello"

greeting.Value = "Hola";
// The device will automatically update to show "Hola"
KoKo Properties are used by all values on all controls in this library, not just scribble strips. This is useful if the desired value actually depends on other values, because they can all be automatically calculated without any manual change event firing or listening.
Property<CultureInfo> cultureInfo;
var greeting = DerivedProperty.Create<string>(cultureInfo, culture => culture.Name switch {
    "es" => "Hola",
    _ => "Hello"
});
scribbleStrip.TopText.Connect(greeting);
// The device will automatically update the greeting shown whenever the cultureInfo Property changes
These Properties are used for reading changing data as well as writing it. You can read the immediate value, as well as registering for events whenever the Property changes in the future.
var button = device.GetRecordButton(0);

if(button.IsPressed.Value){
    Console.WriteLine("Button is pressed");
}

button.IsPressed.PropertyChanged += (sender, args) => {
    if(args.NewValue){
        Console.WriteLine("Button was pressed");
    }
};
If you don't want to create reactive Properties, you can connect the device's Properties to constant values whenever you want them to change.
scribbleStrip.BottomText.Connect("World");
Usage
Rotary encoders
IRotaryEncoder rotaryEncoder = device.GetRotaryEncoder(0);
Illuminating lights
There are thirteen orange lights on each rotary encoder. Set the LightPosition Property to change which light is illuminated.
- In Absolute and Relative control modes, exactly one of them is illuminated at any given time. You can't turn them all off at the same time.
- In HUI mode, zero or more lights can be illuminated at any given time.
- To illuminate multiple lights at the same time, change the
FillProperty fromNoFilltoFillCounterClockwise,FillToCenterSymmetric, orFillToCenterAsymmetric. - To illuminate the boundaries of the range, set the
IlluminateBoundsProperty totrue.
- To illuminate multiple lights at the same time, change the
The lights are numbered from 0 (most counter-clockwise) to 12 (most clockwise). Values are automatically clipped when they are outside the valid range, which will change depending on the HUI-specific Properties.
The number of lights 13 is available programmatically in the LightCount Property.
rotaryEncoder.LightPosition.Connect(0);
// Most counter-clockwise light illuminates
Detecting presses
You can click in on the knob and the rotary encoder's IsPressed Property will change to true (pressed) or false (not pressed).
Console.WriteLine($"Rotary encoder is currently {(rotaryEncoder.IsPressed.Value ? "pressed" : "not pressed")}");

rotaryEncoder.IsPressed.PropertyChanged += (sender, args) =>
        Console.WriteLine($"Rotary encoder was {(args.NewValue ? "pressed" : "released")}");
Detecting rotation
The available Properties and their values for a rotary encoder depend on whether you created your IBehringerXTouchExtender instance using BehringerXTouchExtenderFactory.CreateWithAbsoluteMode(), CreateWithRelativeMode(), or CreateWithHuiMode().
This control mode must match the configured mode on the physical X-Touch Extender (Ctrl, CtrlRel, or HUI, respectively).
Absolute control mode
Available when you set the X-Touch Extender's control mode to Ctrl and called BehringerXTouchExtenderFactory.CreateWithAbsoluteMode().
When the knob is rotated, the rotary encoder will update its RotationPosition Property with the new position of the knob, from 0.0 (most counter-clockwise) to 1.0 (most clockwise).
If you keep turning the knob while it is at one of its numeric limits, the RotationPosition value will stay in the range [0.0, 1.0].
using IAbsoluteBehringerXTouchExtender device = BehringerXTouchExtenderFactory.CreateWithAbsoluteMode();
device.Open();
IAbsoluteRotaryEncoder rotaryEncoder = device.GetRotaryEncoder(0);

rotaryEncoder.RotationPosition.PropertyChanged += (sender, args) =>
        Console.WriteLine($"Knob was turned to {args.NewValue:P0}");
Relative control mode
Available when you set the X-Touch Extender's control mode to CtrlRel and called BehringerXTouchExtenderFactory.CreateWithRelativeMode(), or to HUI and called BehringerXTouchExtenderFactory.CreateWithHuiMode().
When the knob is rotated, the rotary encoder will emit a Rotated event that tells you in which direction it was rotated. It does not tell you how far it was rotated, instead, it sends more Rotated events as you continue to turn the knob.
Each Rotated event corresponds to turning the knob until you feel the next physical detent. One complete 360° rotation is 24 detents, with 15° between each one.
using IRelativeBehringerXTouchExtender device = BehringerXTouchExtenderFactory.CreateWithRelativeMode();
device.Open();
IRelativeRotaryEncoder rotaryEncoder = device.GetRotaryEncoder(0);

rotaryEncoder.Rotated += (sender, args) =>
        Console.WriteLine($"Knob was turned 15° {(args.IsClockwise ? "clockwise" : "counter-clockwise")}");
Scribble strips
These are the eight LCD screens at the top of each track column. They are so named because they are digital replacements for putting a strip of tape on your analog mixer and scribbling the track name on them with a marker.
- In Absolute and Relative control modes, the scribble strips can each show two lines of seven ASCII characters each. The background color can be
Black*,Red,Green,Yellow,Blue,Magenta,Cyan, orWhite. The text color can beLightorDark, with the negative space inverted, and can be set independently for both rows. - In HUI mode, the scribble strips can each show one line of four ASCII characters. The background is always black, and the text is always white.
ICtrlScribbleStrip scribbleStrip = device.GetScribbleStrip(0);
scribbleStrip.TopText.Connect("Hello");
scribbleStrip.BottomText.Connect("World");
scribbleStrip.TopTextColor.Connect(ScribbleStripTextColor.Light);
scribbleStrip.BottomTextColor.Connect(ScribbleStripTextColor.Dark);
scribbleStrip.BackgroundColor.Connect(ScribbleStripBackgroundColor.Magenta);
For low-level protocol details of this control, see the Scribble strip RAW MIDI usage.
* Setting the background color to Black is only useful if you want make it look like the screen is off and not show any text, because it would be so dim as to be illegible. If you instead want to show white text on a black background, you should set the background color to White and the text color to Light.
VU meters
There are eight lights on each VU meter. The lights are numbered from 1 at the bottom to 8 at the top, with 0 representing all lights being turned off. You can change which one is illuminated by setting the LightPosition Property.
- In Relative and Absolute control modes, at most one of the lights can be illuminated at any time. They can also all be turned off.
- In HUI mode, zero or more lights can be illuminated at any time. When you illuminate a given light, all of the other VU lights below it in the same track also illuminate.
The bottom four lights (1–4) are green, the next three (5–7) are orange, and the top light (8) is red.
The maximum value 8 is available programmatically in the IVuMeter.LightCount Property.
IVuMeter vuMeter = device.GetVuMeter(0);
vuMeter.LightPosition.Connect(vuMeter.LightCount);
// Top red light illuminates
Record, solo, mute, and select buttons
IIlluminatedButton recordButton = device.GetRecordButton(0);
IIlluminatedButton soloButton   = device.GetSoloButton(0);
IIlluminatedButton muteButton   = device.GetMuteButton(0);
IIlluminatedButton selectButton = device.GetSelectButton(0);
Illuminating lights
When you set a button's IlluminationState Property to On, the button lights up with a color that depends on the kind of button it is. The record and mute buttons light up red, the solo buttons light up yellow, and the select buttons light up green.
You can also use the Blinking value to make a button blink with a repeating pattern of 0.5 seconds on, 0.5 seconds off. The Off value turns off the light. When they are off, all of the buttons are gray.
button.IlluminationState.Connect(IlluminatedButtonState.On);
// Light up whenever button is pressed
button.IlluminationState.Connect(DerivedProperty<IlluminatedButtonState>.Create(button.IsPressed, isPressed =>
        isPressed ? IlluminatedButtonState.On : IlluminatedButtonState.Off));
Detecting presses
You can press the buttons and their IsPressed Properties will change to true (pressed) or false (not pressed).
Faders
Faders are the vertical sliders on each track. They are motorized, so you can move them programmatically to any given position. You can also move them manually with your fingers and detect where they went.
The finger rest knobs have capacitive touch sensors, so the device can sense when you are touching the fader knob, which is useful for preventing the device from moving the fader out from under you when you don't expect it and possibly hurting your hand.
IFader fader = device.GetFader(0);
Detecting presses
You can touch the fader knob and its IsPressed Property will change to true (touching) or false (not touching).
fader.IsPressed.PropertyChanged += (sender, args) =>
        Console.WriteLine($"{(args.NewValue ? "Touching" : "Not touching")} fader");
Requesting movement
The range of motion for each fader is from 0.0 at the bottom to 1.0 at the top. If you try to move the fader to a value outside this range, it will be clipped to stay within the range [0.0, 1.0].
Move a fader by changing the value of its DesiredPosition Property.
The printed legends on the physical device go from -∞ at the bottom to 10 at the top, with the 0 legend corresponding to a logical value of about 0.75 in this library.
When you read the value of this Property, it returns the most recent position to which you programmatically requested the fader to move, which may be out-of-date, rather than its current position. To get its current position instead, use ActualPosition (see Detecting movement).
fader.DesiredPosition.Connect(1.0);
// Fader moves all the way to the top of its travel distance.
If the fader is being pressed when you change the DesiredPosition value, the change will be automatically ignored so that the knob moving doesn't surprise or hurt the user.
Detecting movement
There is a separate ActualPosition Property that shows where the fader is currently located, which is different from the DesiredPosition Property that you use to actuate the motor. These are two separate Properties instead of one in order to prevent infinite event loops, and to make it possible to subscribe to only the changes events that you want.
This Property will change in response to both manual (finger) and automatic (motor) movement, so it will always have an up-to-date value for the fader's position.
fader.ActualPosition.PropertyChanged += (sender, args) =>
        Console.WriteLine($"Fader moved to {args.NewValue:P0}");
Disposal
When you're done using an IBehringerXTouchExtender<> instance, you should dispose of it to cleanly close the MIDI connection to the device. You can do this explicitly by calling IBehringerXTouchExtender.Dispose(), implicitly with a using statement or declaration, or implicitly with a dependency injection framework that manages the lifecycle of your components.
public void ExplicitlyDispose() {
    var device = BehringerXTouchExtenderFactory.CreateWithRelativeMode();
    device.Open();
    // use device here
    device.Dispose();
}
public void ImplicitlyDisposeWithUsingDeclaration() {
    using var device = BehringerXTouchExtenderFactory.CreateWithRelativeMode();
    device.Open();
    // use device here
    // when control exits the ImplicitlyDisposeWithUsingDeclaration method, device will be disposed
}
public void ImplicitlyDisposeWithUsingStatement() {
    using (var device = BehringerXTouchExtenderFactory.CreateWithRelativeMode()) {
        device.Open();
        // use device here
        // when control exits the using block, device will be disposed
    }
}
References
- Product page: Behringer X-Touch Extender
- Documentation: Quick Start Guide
- Documentation: MIDI interface specifications
- ~Firmware: 1.22 ZIP~ deleted, see saved firmware in this repository
Acknowledgements
- Maxim Dobroselsky for the DryWetMIDI library that controls MIDI devices from .NET
- The person on the now-deleted MusicTribe forums who correctly ~answered a question~ about the 5th byte of the scribble strip SysEx message, the value of which must be the device ID
0x15instead of the incorrectly documented0x42
| Product | Versions Compatible and additional computed target framework versions. |
|---|---|
| .NET | net5.0 was computed. net5.0-windows was computed. net6.0 was computed. net6.0-android was computed. net6.0-ios was computed. net6.0-maccatalyst was computed. net6.0-macos was computed. net6.0-tvos was computed. net6.0-windows was computed. net7.0 was computed. net7.0-android was computed. net7.0-ios was computed. net7.0-maccatalyst was computed. net7.0-macos was computed. net7.0-tvos was computed. net7.0-windows was computed. net8.0 was computed. net8.0-android was computed. net8.0-browser was computed. net8.0-ios was computed. net8.0-maccatalyst was computed. net8.0-macos was computed. net8.0-tvos was computed. net8.0-windows was computed. net9.0 was computed. net9.0-android was computed. net9.0-browser was computed. net9.0-ios was computed. net9.0-maccatalyst was computed. net9.0-macos was computed. net9.0-tvos was computed. net9.0-windows was computed. net10.0 was computed. net10.0-android was computed. net10.0-browser was computed. net10.0-ios was computed. net10.0-maccatalyst was computed. net10.0-macos was computed. net10.0-tvos was computed. net10.0-windows was computed. |
| .NET Core | netcoreapp2.0 was computed. netcoreapp2.1 was computed. netcoreapp2.2 was computed. netcoreapp3.0 was computed. netcoreapp3.1 was computed. |
| .NET Standard | netstandard2.0 is compatible. netstandard2.1 was computed. |
| .NET Framework | net461 was computed. net462 was computed. net463 was computed. net47 was computed. net471 was computed. net472 was computed. net48 was computed. net481 was computed. |
| MonoAndroid | monoandroid was computed. |
| MonoMac | monomac was computed. |
| MonoTouch | monotouch was computed. |
| Tizen | tizen40 was computed. tizen60 was computed. |
| Xamarin.iOS | xamarinios was computed. |
| Xamarin.Mac | xamarinmac was computed. |
| Xamarin.TVOS | xamarintvos was computed. |
| Xamarin.WatchOS | xamarinwatchos was computed. |
-
.NETStandard 2.0
- KoKo (>= 2.4.0-beta.1)
- Melanchall.DryWetMidi (>= 8.0.3)
NuGet packages
This package is not used by any NuGet packages.
GitHub repositories
This package is not used by any popular GitHub repositories.
| Version | Downloads | Last Updated |
|---|---|---|
| 2.0.0-beta.0 | 62 | 6/29/2026 |
| 1.0.1 | 362 | 4/25/2024 |
| 1.0.0 | 569 | 11/12/2022 |
| 0.0.1-SNAPSHOT2 | 348 | 10/25/2022 |
| 0.0.1-SNAPSHOT1 | 335 | 10/8/2022 |